
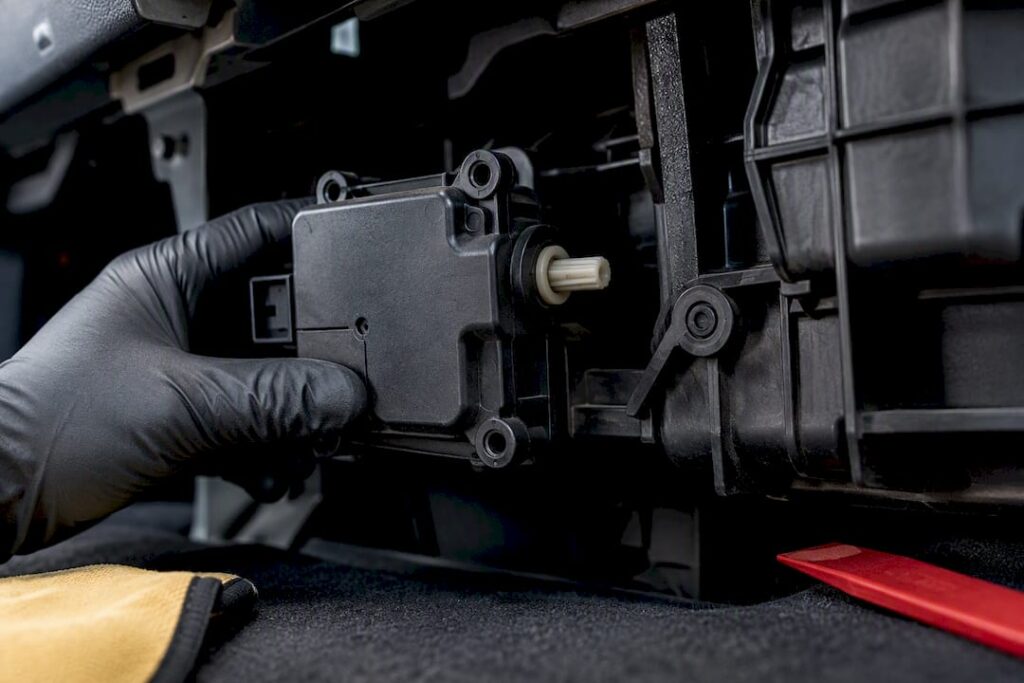
A blend door actuator is the small electric motor that positions the flap controlling how much hot and cold air mixes before it reaches your vents, and the clearest sign it’s failing is a rhythmic clicking behind the dashboard or air that never matches the temperature you set. If you hear that clicking or notice one side of the cabin running warmer than the other, start with a simple observation test before assuming the worst. When dashboard warning lights or diagnostic trouble codes show up, it’s time for a scan tool or a trip to a qualified shop.
TL;DR:
- The most common sign of a failing blend door actuator is rhythmic clicking caused by stripped internal gears, not just temperature issues.
- Proper diagnosis involves a scan tool command test, manual shaft check, and electrical inspections to distinguish between actuator failure and other HVAC problems.
- Accessibility influences repair time significantly, with some actuators behind trim panels requiring professional tools and expertise for replacement.
- Calibration with a bidirectional scan tool is essential after installing a new actuator to ensure the blending door moves correctly and to prevent recurring faults.
- DIY replacement is feasible for accessible actuators with clear symptoms, but complex cases involving the door itself or wiring issues benefit from professional diagnostic confirmation.
Table of Contents
- What the blend door actuator does inside your HVAC system
- Common symptoms and what they usually point to
- How to confirm the actuator is actually the problem
- Replacing the actuator: access, tools, and the steps that matter
- Calibrating and verifying the repair after installation
- Deciding between DIY and a professional shop
- How a shop diagnoses a blend door actuator fault
- Getting your climate control fixed the right way
- Where to learn more about actuator diagnostics
- Sources
- FAQ
What the blend door actuator does inside your HVAC system
The blend door actuator sits inside the HVAC air-management box, usually tucked behind the dashboard or glove box, and its only job is to move a flap called the blend door. That door swings between two positions, one that routes air across the heater core and one that routes it past the evaporator, and everywhere in between. Move it a little one way and you get slightly warmer air, move it the other way, and the cabin cools down.
Inside the actuator itself is a small DC motor connected to a plastic gear train that steps down the motor’s speed into precise, controlled movement. Most actuators also include a position sensor, either a potentiometer or a digital encoder, mounted on a small circuit board that tells the HVAC control module exactly where the door sits at any moment. That feedback loop matters because the module doesn’t just tell the actuator to move, it also checks whether the door actually got there.
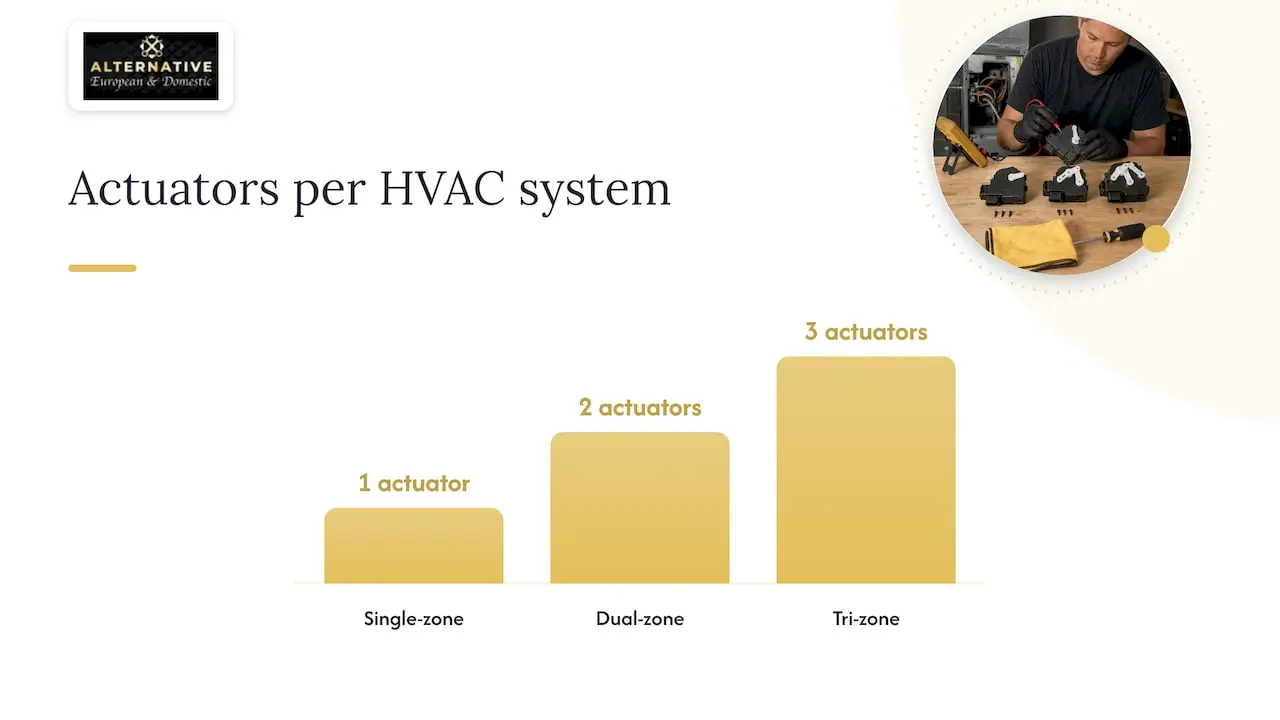
Vehicles with single-zone climate control use one blend door actuator for the whole cabin. Dual-zone and tri-zone systems use two or three, one per zone, which is why a failure often affects only the driver’s side or only the passenger’s side rather than the entire cabin.
- Electronic actuators use a motor and encoder and communicate over the vehicle’s data network.
- Older or lower-cost systems sometimes use vacuum-operated actuators controlled by a solenoid instead of a motor.
- Mounting locations vary, but most sit on the HVAC housing under the dash, near the center console, or behind the glove box.
Common symptoms and what they usually point to
The single most reliable symptom of a failing blend door actuator is a rhythmic clicking or knocking sound coming from behind the dashboard, especially when you first start the car or adjust the temperature. That sound is almost always caused by stripped internal plastic gears: the motor keeps trying to move, the control module keeps sending commands, but the gears slip instead of turning the door, and the result is a repeating click as the motor hunts for a position it can’t reach, according to Carparts.
Beyond the clicking, a few other patterns show up consistently:
- Temperature that stays stuck hot or cold no matter what you set on the climate control.
- One side of the cabin running noticeably warmer or cooler than the other on dual-zone systems.
- Erratic, unpredictable swings between hot and cold with no clear pattern.
- A slow or soft-start delay before air temperature changes after you adjust the setting.
A failing actuator typically shows up as rhythmic clicking, temperature mismatch, or one-sided imbalance on dual-zone systems. Recognizing which pattern you’re dealing with narrows down whether the fault is in the actuator itself or somewhere else in the system.
Not every temperature complaint traces back to the blend door. A weak blower motor, low refrigerant, a clogged heater core, or a corroded wiring connector can produce similar symptoms, so it helps to rule those out before assuming the actuator is the culprit.
How to confirm the actuator is actually the problem
Replacing a blend door actuator without confirming the fault first is one of the most common ways owners waste money on parts that don’t fix anything, since a bound or broken door can produce the same clicking and temperature symptoms as a failed motor, according to a structured diagnostic approach. Work through the checks in order rather than jumping straight to a new part.
- Observe startup behavior. Most systems run a self-calibration sweep when you start the car; listen for clicking during that sweep and again when you change the temperature setting.
- Run the system full-cold, then full-hot. Note whether the air temperature actually changes or stays fixed regardless of the dial position.
- Try a no-tools check. On some vehicles you can access the actuator area behind the glove box and watch or feel for shaft movement as you adjust the temperature.
- Check power and ground with a multimeter. Back-probe the actuator connector for voltage and a solid ground, and inspect the pins and harness for corrosion or looseness.
- Command the actuator with a scan tool. A bidirectional scan tool can send a direct command to the actuator, read the position feedback, and run an actuator calibration test rather than relying on the dashboard controls alone, according to ANCEL.
- Pull any stored HVAC codes. Codes such as B10A7 or B1051 point toward a calibration or travel-span fault and give you a starting point rather than a guess.
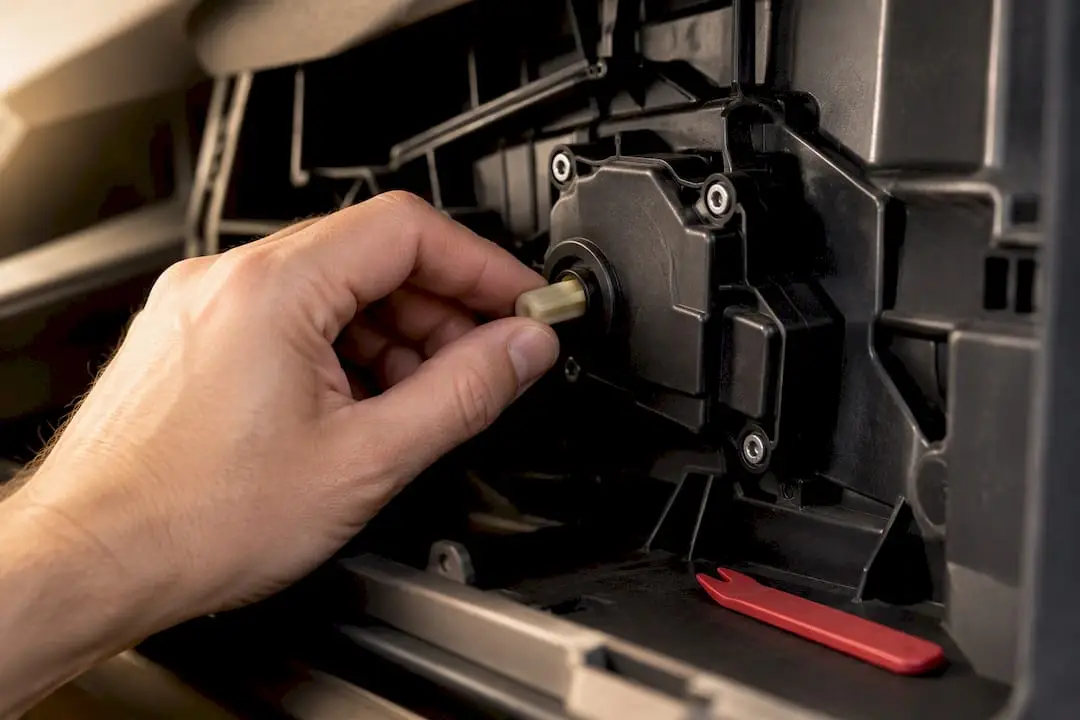
- Verify mechanically after removal. Once the actuator is out, hand-rotate the blend door shaft; if it binds or won’t move freely, the door itself, not the actuator, is the real problem, according to Renegade Solutions.
The key distinction to watch for: if the scan tool commands the actuator and nothing moves, the actuator or its wiring is likely at fault. If the scan tool shows no command reaching the actuator at all, the control module or the circuit feeding it deserves a closer look before you touch the part.
Pro Tip: Always rotate the blend door shaft by hand before buying a replacement actuator. A binding door will strip a brand-new motor just as fast as it stripped the old one.
Replacing the actuator: access, tools, and the steps that matter
Access is the variable that determines how long this job takes. Some actuators sit right behind the glove box and take a few minutes to reach, while others are buried deep under the dash behind trim panels and the center console, and accessibility drives labor time far more than the price of the part itself, according to Aetrix.
A basic toolkit for this job includes stubby screwdrivers, a small ratchet set with short extensions, and plastic trim tools to avoid cracking dash panels. The general sequence looks like this:
- Disconnect the battery before opening up the dash to avoid airbag or electrical faults.
- Remove the glove box or lower dash panels needed to reach the actuator housing.
- Label every connector as you disconnect it, since several actuators can look nearly identical.
- Unbolt the old actuator, confirm the door shaft moves freely by hand, then install the new unit.
- Reinstall panels and torque fasteners evenly so the actuator mounting posts don’t crack.
A few mistakes cause immediate repeat failures. The most common is grabbing the mode door actuator instead of the blend door actuator, since they often look alike and sit close together. Another is skipping the manual shaft check and bolting in a new actuator on top of a door that’s still binding, which strips the new gears within days. Loose or partially seated connectors also cause intermittent faults that mimic a bad actuator when the real issue is a poor connection.
Calibrating and verifying the repair after installation
A new actuator isn’t finished until it’s calibrated.
- Use a bidirectional scan tool when possible. It commands the actuator through its full range, confirms the feedback signal, and runs the calibration routine automatically.
- Consider manual relearn methods only as a fallback. Disconnecting the battery, pulling a fuse, or cycling the ignition can sometimes trigger a basic relearn, but these methods are less precise than a scan-tool calibration and don’t confirm travel span the same way, and even determined DIYers researching self-performed calibration procedures run into the same limits when a job depends on dedicated equipment.
- Cycle the temperature from full-cold to full-hot. Confirm the air actually changes smoothly with no clicking or lag.
- Clear any stored codes and recheck. If a code returns after clearing it, the calibration didn’t take or another fault remains.
Deciding between DIY and a professional shop
Whether this is a reasonable weekend project depends on where the actuator sits and what your diagnosis turned up. If it’s accessible behind the glove box, the clicking is clear, and your multimeter checks came back clean, a confident DIYer with basic tools can usually handle it.
Other situations call for a professional shop instead:
- The actuator is buried behind extensive dash or console trim with airbag components nearby.
- Multiple HVAC diagnostic trouble codes are stored, suggesting a control module or wiring issue rather than a simple part swap.
- The blend door itself is cracked, jammed, or structurally damaged inside the housing.
Pro Tip: If your scan tool shows commands reaching the actuator but no movement, and a manual shaft check confirms the door isn’t binding, you’re very likely looking at a failed motor or gear set, not a wiring problem.
A shop brings bidirectional scan tools that go beyond basic code readers, sourcing for correctly matched parts, and a verification process that confirms the calibration held before you drive away.
How a shop diagnoses a blend door actuator fault
A technician working through this repair follows the same order a careful DIYer would, just with dealer-level equipment. That starts with commanding the actuator directly through a bidirectional scan tool, inspecting the harness and connector for corrosion or damage, manually checking the blend door for binding, and confirming the fix with a full calibration and temperature cycle before signing off. Thorough command and feedback testing up front prevents the most expensive mistake in this repair: replacing a part that was never the problem.
A professional shop applies that same sequence on European, domestic, and high-performance vehicles, using dealer-level diagnostic tools and qualified technicians to confirm a fault before recommending a repair.
— Alternative European & Domestic
Getting your climate control fixed the right way
A clicking dashboard or air that won’t match your temperature setting is worth diagnosing properly rather than guessing at a fix. Professional shops use dealer-level diagnostic tools to command the actuator, check the harness, and confirm the blend door itself moves freely before any part gets replaced, ensuring the repair addresses the actual issue rather than replacing parts unnecessarily.

At an appointment, expect a full diagnostic pass: command testing on the actuator, a harness and connector inspection, a manual check of the blend door, and a calibration and temperature cycle to confirm the repair held.
- Auto A/C repair and full HVAC diagnostics for hot, cold, or one-sided temperature complaints.
- Blend door actuator replacement with dealer-level bidirectional scan tools for calibration.
- Broader HVAC housing inspection when the door itself, not just the actuator, needs attention.
If your climate control has been clicking, stuck, or uneven, schedule your A/C diagnostic with Alternative European & Domestic and get it checked properly.
Where to learn more about actuator diagnostics
For deeper reading, CarParts.com covers symptoms and location details, while ANCEL explains scan-tool calibration procedures in more depth.
Sources
- Carparts
- How To Diagnose A Blend Door Actuator Failure In Car HVAC Systems (DIY Guide)
- How To Calibrate A Blend Door Actuator | ANCEL
FAQ
What happens when a blend door actuator goes bad?
A failing actuator typically produces a rhythmic clicking sound behind the dashboard, along with temperature that won’t match your climate control setting or, on dual-zone systems, one side running warmer or cooler than the other. The clicking usually comes from stripped internal gears that slip as the motor keeps trying to reach a commanded position.
How do I reset the blend door actuator?
The most reliable reset method uses a bidirectional scan tool to run a calibration routine that measures the door’s full travel range and stores it as a pulse count. Manual methods like disconnecting the battery or pulling a fuse can sometimes trigger a basic relearn, but they’re less precise and don’t confirm the travel span the way a scan tool does.
How much does it cost to replace a blend actuator?
Alternative European & Domestic does not publish set pricing for this repair since cost depends heavily on labor time, and labor time depends on how accessible the actuator is on your specific vehicle. Actuators tucked behind extensive dash or console trim take longer to reach than ones sitting right behind the glove box, which is the main factor driving cost more than the part price itself. Contact a shop directly for an estimate based on your vehicle.
Can I replace my blend door actuator myself?
Yes, if the actuator is easily accessible, the clicking symptom is clear, and your electrical checks come back clean, replacing it yourself is a reasonable project with basic tools. Always manually rotate the blend door shaft before installing the new actuator to confirm the door itself isn’t binding, since skipping that check is the most common cause of a new actuator failing almost immediately.