
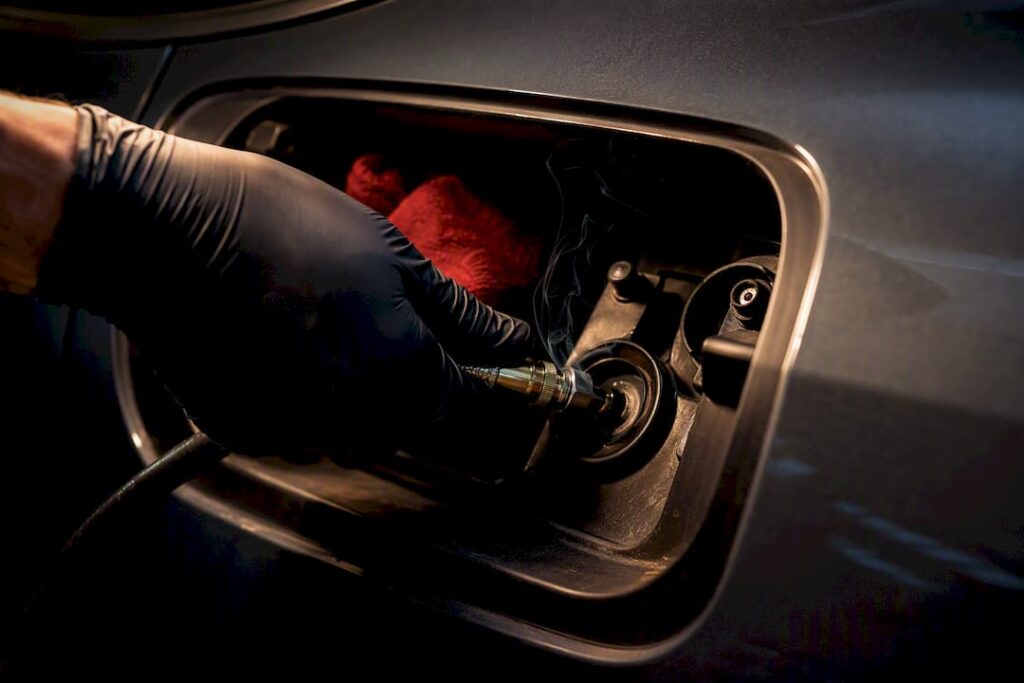
If your check engine light is on with a P04xx code and you catch a whiff of fuel near the rear of the car, you’re most likely looking at an EVAP leak. Start here: tighten or replace the gas cap, pull the stored codes with an OBD-II reader, and if the fuel smell is strong or you see any wet fuel staining, stop driving and get it inspected before going further. A loose or cracked gas cap causes a surprising share of these codes, so ruling that out first saves you time and money.
TL;DR:
- Most EVAP leaks are caused by a loose or cracked gas cap, which is easy and inexpensive to fix before moving on to detailed diagnostics.
- Physical visual inspections of hoses, filler necks, and charcoal canisters usually identify simple issues, saving time and money.
- Advanced diagnosis often requires smoke testing, pressure decay, or hydrocarbon sniffers, which are typically available only at professional repair shops.
- Clearing the code without confirming the leak or completing a proper drive cycle can lead to repeated failures and failed emissions tests.
- Proper sequence involves confirming the leak exists, ruling out electrical faults, localizing the leak, then repairing and verifying, minimizing unnecessary part replacements.
Table of Contents
- Evap Leak Diagnosis: Your Quick Checklist Before You Dig Deeper
- What Your Symptoms and Codes Actually Mean
- Tools That Actually Find an Evap Leak
- The Diagnostic Workflow: Confirm, Localize, Fix, Verify
- How Smoke and Pressure Testing Actually Work
- Deciding Between a DIY Fix and a Professional Shop
- Why Clearing the Code Isn’t the Finish Line
- Why Professional Diagnostics Matter for European and High-Performance Vehicles
- Our Take: Skip the Guesswork, Follow the Sequence
- Schedule an Evap Diagnostic With Alternative European & Domestic
- Sources
- FAQ
Evap Leak Diagnosis: Your Quick Checklist Before You Dig Deeper
Before you touch a smoke machine or book a shop appointment, run through this short list. It takes fifteen minutes and tells you whether you’re dealing with something simple or something that needs real diagnostic gear.
- Check the gas cap first. Remove it, inspect the rubber seal for cracks or debris, and listen for the proper number of clicks when you tighten it back down. A worn cap is one of the most common causes of a stored evaporative emissions code.
- Pull the OBD-II codes and write them down. Note the exact code (P0442, P0455, P0456, and so on) along with the freeze-frame data before you clear anything.
- Walk the vehicle and inspect visible hoses, the charcoal canister, and the filler neck for cracks, disconnections, or chew marks from rodents, which are more common than most owners assume.
- Smell for location. Fuel odor near the engine bay points toward the purge valve or intake side of the system; odor near the rear axle or fuel tank area points toward the tank, filler neck, or canister.
- Limit driving until you know more. Short, necessary trips are fine in most cases, but avoid parking in an enclosed garage if the smell is noticeable.
- Document when the light came on, especially whether it happened right after a fill up. Codes that appear after refueling often trace back to the cap or filler neck rather than a deeper system fault.
This checklist won’t fix an EVAP leak, but it narrows down where the problem likely lives, which is exactly what a technician does in the first five minutes of a real diagnosis.
What Your Symptoms and Codes Actually Mean
An evaporative emissions leak rarely announces itself with a single obvious symptom. Most owners notice a faint fuel smell after parking, a rough idle right after refueling, or an occasional hissing sound from under the hood when the engine shuts off. The check engine light is usually the first hard evidence, and the specific code behind it tells you a lot more than “evap system leak detected.”
Pro Tip: Write down the code and freeze-frame data before you clear it. Clearing codes too early erases the exact conditions the self-test needs to run again, which can send you back to square one.
Here’s how the common P04xx codes generally break down:
- P0440 — A general evaporative system malfunction, usually meaning something failed a broader system check without pointing to an exact cause.
- P0442 — A small leak detected, often from a loose gas cap, a hairline crack in a hose, or a degraded seal.
- P0455 — A large leak detected, frequently caused by a disconnected hose, an open filler cap, or a cracked vent line.
- P0456 — A very small leak, the hardest category to pin down without sensitive equipment.
- P0457 — Fuel cap loose or missing, which is exactly what it sounds like and worth checking first every time.
- P0441, P0443, P0446 — Issues with the purge valve, purge control circuit, or vent path rather than a physical leak in the lines themselves.
Trouble codes actually map to leak size categories in modern vehicles, and some newer cars can flag leaks as small as roughly 0.010 inches in diameter, which is smaller than a pinhole. That sensitivity is part of why a leak that seems minor on paper can still trigger a code and why finding it by eye alone often fails.
Tools That Actually Find an Evap Leak
A basic OBD-II code reader, a digital multimeter, and a set of hand tools will get a confident DIYer through the initial checklist and a visual inspection. Beyond that, the diagnosis usually calls for equipment most home garages don’t have.
Shop-grade diagnostics typically include an enhanced scan tool capable of running active or actuation tests on the purge and vent valves, a low-pressure smoke machine built specifically for EVAP work, a leak detection pump or pressure transducer for decay testing, and handheld hydrocarbon (HC) sniffers for pinpointing a leak once smoke reveals its general area.
- Entry-level: OBD-II reader, multimeter, flashlight, basic wrenches
- Mid-tier: enhanced scan tool with bidirectional control
- Shop-grade: EVAP-safe smoke machine, pressure transducer or leak detection pump, HC sniffer
Pro Tip: Never use a standard shop air compressor to smoke-test an EVAP system. Compressed shop air can introduce moisture and contaminants, and it runs at pressures far above what these plastic components are rated for. Smoke testing calls for inert gas or purpose-built EVAP smoke fluid at low pressure, which is why this step usually belongs at a professional shop.
The Diagnostic Workflow: Confirm, Localize, Fix, Verify
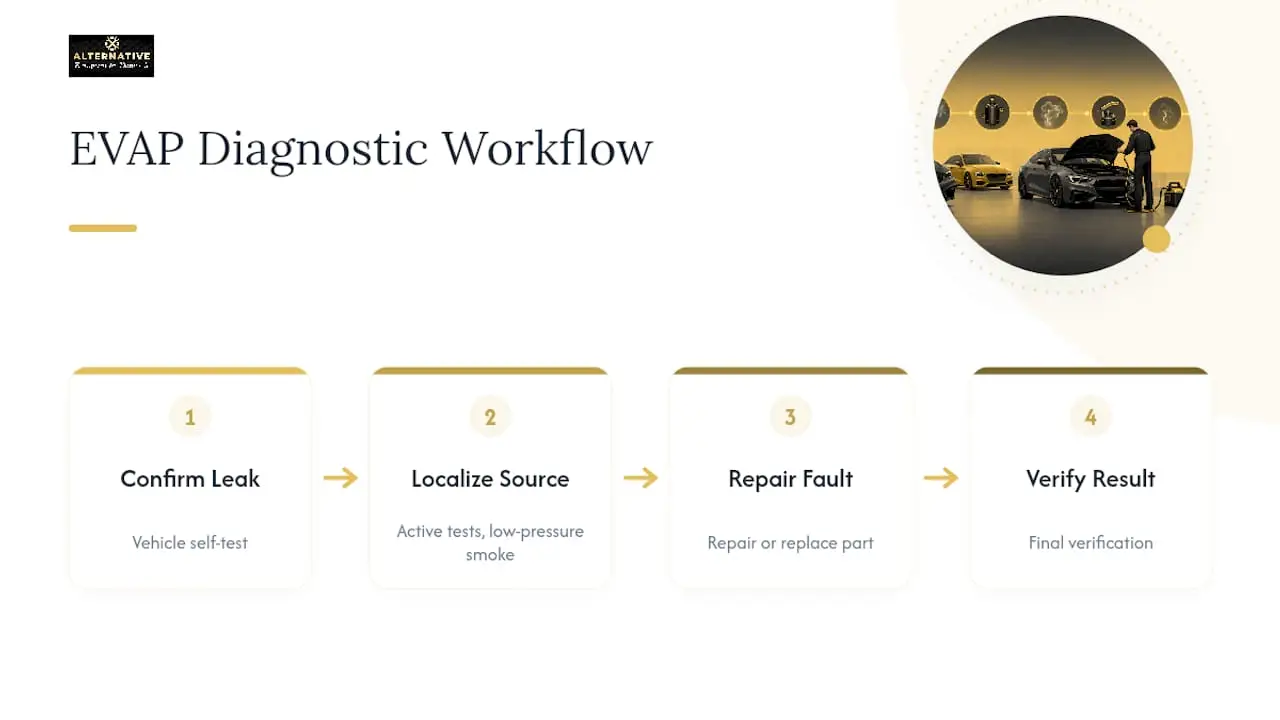
Technicians don’t randomly start smoking a system the moment a P0455 pops up. There’s a sequence to this, and skipping steps is exactly how people end up replacing three parts before finding the actual leak. Leaks are the leading cause of EVAP-related trouble codes, and a structured workflow that starts with the vehicle’s own self-test before smoke testing consistently avoids unnecessary parts replacement.
Phase A: Confirm the fault exists
- Save the stored code and freeze-frame data before clearing anything. Clearing prematurely can wipe out the exact conditions the self-test needs to run again, forcing you to wait for the fault to reoccur naturally.
- Run the EVAP self-test where the vehicle supports it. Many manufacturers build a leak detection module (DMTL) or leak detection pump (LDP) into the system specifically for this purpose, and it can confirm a leak exists before you touch a wrench.
- Note the ambient temperature and fuel level at the time of the fault. EVAP self-tests generally won’t run outside certain fuel-level and temperature windows, and this affects how soon you’ll get a confirmed result.
Phase B: Rule out electrical faults
- Use a scan tool to command the purge valve and vent valve open and closed, watching for the expected response each time. Technicians commonly rely on these active component tests specifically to separate a wiring or valve problem from an actual physical leak, since a stuck valve can mimic leak symptoms without any crack or hole in the system.
- Check the fuel tank pressure (FTP) sensor’s live data. A sensor that isn’t reporting realistic values will send a diagnosis down the wrong path even if the rest of the system is sealed tight.
Phase C: Localize the actual leak
- Perform a visual inspection of every accessible hose, the filler neck, and the charcoal canister before reaching for the smoke machine. Cracked rubber, loose clamps, and rodent damage are common enough that this step alone sometimes ends the search.
- Run a low-pressure smoke test, watching for visible smoke escaping at a hose junction, a cracked canister seam, or around the filler neck. Professional diagnosis commonly pairs active valve tests with FTP monitoring and then follows with smoke testing once a leak is confirmed but not yet located.
- If smoke alone doesn’t reveal anything, follow up with a pressure decay test using a leak detection pump or pressure transducer, or use trace gas with a handheld detector. Pressure transducers give repeatable, quantifiable data that a visual smoke check alone can’t provide, which matters when the leak is small enough to escape the naked eye.
- For leaks smoke genuinely can’t find, an HC sniffer or an inert trace gas and handheld detector can pick up what smoke misses, particularly on very fine cracks that absorb or dissipate smoke before it becomes visible.
Phase D: Repair and verify
- Replace the failed component: hose, valve, canister, or filler neck seal, depending on what the localization step revealed.
- Clear the code only after the repair is complete and documented.
- Run a drive cycle to let the EVAP readiness monitor complete, then confirm with the scan tool that the monitor shows “ready” rather than “incomplete.”
| Phase | Goal | Typical Tools |
|---|---|---|
| A: Confirm | Verify a leak actually exists | Scan tool, self-test/DMTL |
| B: Rule out electrical | Separate wiring/valve faults from leaks | Scan tool active tests, FTP sensor data |
| C: Localize | Find where the leak physically is | Smoke machine, pressure transducer, HC sniffer |
| D: Repair and verify | Fix and confirm the fix holds | Replacement parts, drive cycle, readiness scan |
How Smoke and Pressure Testing Actually Work
Smoke testing looks almost magical when you watch it done right: a thin stream of smoke curls out of a hairline crack in a hose you’d never have spotted otherwise. But the method has real limits, and understanding them keeps you from assuming a clean smoke test means a clean system.
Shops run these tests at low pressure, typically in the 0.5 to 1.0 PSI range, because EVAP components are made of plastic and rubber not designed to handle much more than that. Push the pressure higher and you risk blowing out a seal that was fine to begin with, which turns a diagnostic step into a repair job you didn’t need.
Smoke testing should always use EVAP-safe smoke fluid paired with inert gas rather than compressed shop air. Shop air introduces moisture and runs at pressures well above what these components are rated for, creating both an accuracy problem and a safety risk.
- Inert gas (usually nitrogen) avoids the ignition risk that compressed air near a fuel system can create.
- EVAP-safe smoke fluid is formulated not to leave residue that clogs the small orifices found throughout the system.
- Smoke can fail to reveal very fine leaks because the smoke particles get absorbed or dissipate before escaping through a pinhole-sized gap.
- When smoke comes back clean but the code persists, a pressure decay test or an HC sniffer picks up where smoke leaves off.
This is exactly why a shop that only owns a smoke machine can hit a wall on the smallest leaks. Pairing smoke testing with HC sniffing and pressure transducers validates a finding rather than leaving it to a visual guess, and it’s the difference between a confirmed repair and a comeback three weeks later.
Deciding Between a DIY Fix and a Professional Shop
Some EVAP problems genuinely don’t need a shop visit. A cracked gas cap, a visibly split hose you can reach without pulling other components, or a disconnected line you can see and reconnect by hand are all reasonable DIY fixes if you’re comfortable with basic tools.
Everything past that point starts to need equipment most driveways don’t have. Active component testing through a scan tool, low-pressure smoke testing, and HC sniffing all require gear that costs more than most owners will spend on a single repair, which is where a professional diagnosis earns its keep.
- DIY-appropriate: gas cap replacement, visible hose replacement, obvious disconnections
- Shop-required: smoke testing, DMTL/pressure decay testing, HC sniffing, active valve commands
- Seek help immediately: strong persistent fuel odor, visible fuel staining or dripping, or a code that returns immediately after a basic fix
Pro Tip: If you’ve already replaced the gas cap and the same code comes back within a day or two of clearing it, don’t replace another part on a guess. That pattern almost always means the leak is somewhere the self-test can find but your eyes can’t, and it’s time for a scan-tool-driven diagnosis.
Professional diagnostics reduce guesswork because dealer-level tools can actuate individual components and read live pressure data in real time, rather than relying on trial-and-error part swapping. That matters even more on European and high-performance vehicles, where the EVAP system often integrates more tightly with the engine management software.
Why Clearing the Code Isn’t the Finish Line
Clearing a code makes the check engine light go off, but it doesn’t prove the leak is actually fixed. The EVAP system has to run its own readiness monitor and pass before you know the repair held, and that monitor won’t run under just any conditions.
Readiness monitors typically need specific fuel level ranges, a certain ambient temperature window, and a drive cycle that includes both highway and stop-and-go conditions. Fill the tank to the brim or run it below a quarter tank, and the monitor may simply refuse to run at all, leaving you guessing whether the fix worked.
- Watch the scan tool during the self-test to confirm the purge and vent valves respond correctly and the FTP sensor reports realistic pressure changes.
- Complete a full drive cycle, not just a short trip around the block, before checking monitor status again.
- Ask the shop to show you the completed readiness state directly on the scan tool rather than just telling you the light is off.
If you’re heading toward a state emissions test, a monitor that hasn’t completed will fail the inspection even with the check engine light off. That’s a detail worth confirming with a pre-inspection check before you show up expecting a pass.
Why Professional Diagnostics Matter for European and High-Performance Vehicles
Alternative European & Domestic approaches EVAP faults the same reproducible way outlined above: confirm the leak with a self-test, run active component tests to rule out electrical faults, then move to low-pressure smoke and HC sniffing to pinpoint the exact location. That order matters because guessing wastes your money on parts that were never the problem.
European and high-performance vehicle often route their EVAP systems through more tightly integrated engine management software than typical domestic models, which makes dealer-level scan tools genuinely useful rather than optional. Alternative European & Domestic uses that equipment alongside EVAP-safe low-pressure smoke testing to locate leaks precisely rather than replacing components on a hunch.
Every diagnosis typically comes with findings explaining what was found, what’s recommended, and why, followed by verification once the repair is complete.
Our Take: Skip the Guesswork, Follow the Sequence
The biggest mistake we see with evap leak diagnosis isn’t a lack of effort. It’s skipping straight to smoke testing before confirming the leak exists and ruling out an electrical fault first. A stuck purge valve can mimic a leak’s symptoms perfectly, and smoking a system that has a wiring problem, not a physical crack, wastes time and money on a test that was never going to find anything.
The conventional advice to “just smoke test it” also undersells how often a five-minute gas cap check solves the whole problem. Skipping that step and jumping to expensive diagnostics is backwards. At the same time, don’t assume a clean smoke test means a clean system. The smallest leaks, the ones triggering P0456, routinely slip past visual smoke inspection and need a pressure transducer or HC sniffer to confirm.
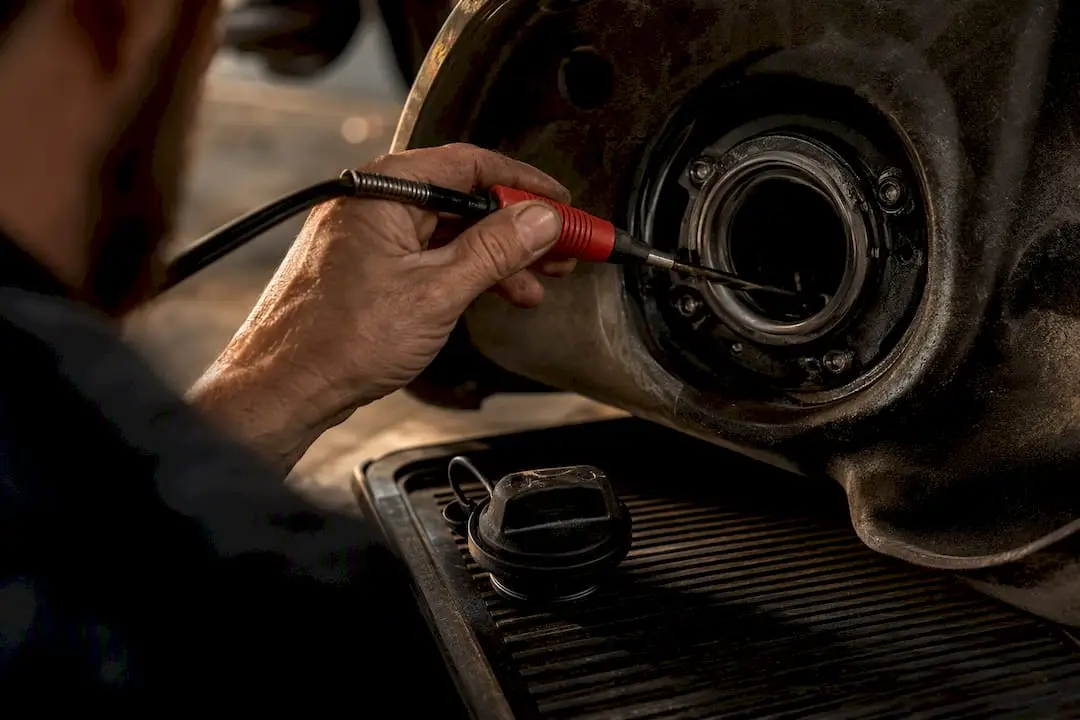
If you take one thing from this: save your freeze-frame data, confirm before you localize, and localize before you replace parts. That order is what separates a fixed car from a repeat comeback.
Schedule an Evap Diagnostic With Alternative European & Domestic
Alternative European & Domestic gives you a documented diagnosis instead of a part-swapping guessing game, which matters when an EVAP leak on a European or high-performance vehicle can hide behind three different possible causes at once.

A diagnostic appointment includes a full scan for stored codes and freeze-frame data, active component testing on the purge and vent valves, and low-pressure smoke or pressure testing when the fault needs precise localization. You’ll get an itemized breakdown of what was found and what it will take to fix it, so you know exactly what you’re paying for before any repair starts.
Dealer-level diagnostic equipment and technicians familiar with European and high-performance systems typically shorten the time it takes to find a leak, which means fewer parts replaced on a hunch. If you’ve already pulled codes at home, bring that saved data with you. It gives our technicians a head start on the diagnosis instead of starting from zero. Schedule your diagnostic appointment with Alternative European & Domestic and get a straight answer on what’s actually causing that check engine light.
Sources
- EVAP System Diagnosis
- What is an EVAP system leak and how to diagnose?
- EVAP System Diagnosis – P0440, P0442, P0456 and Smoke Testing
FAQ
How Expensive Is It to Fix an Evap Leak?
Cost depends entirely on what’s causing the leak. A gas cap replacement is inexpensive, while a failed charcoal canister or a leak buried deep in the filler neck involves more labor and parts. A shop diagnosis pinpoints the exact cause before you commit to a repair, so you’re not paying for guesswork.
How Do I Know If My Evap Is Leaking?
The clearest signs are a check engine light with a P04xx code, a fuel smell near the tank or engine bay, and occasionally a rough idle right after refueling. Reading the stored code and running a smoke or pressure test confirms it beyond a smell alone.
Is It Bad to Drive With an Evap Leak?
Driving short distances with a minor EVAP leak is generally not dangerous, but a persistent strong fuel odor or visible fuel staining means you should stop driving and get it inspected, since ignoring it can lead to a saturated charcoal canister and a failed emissions test.
Is an Evap Leak Hard to Fix?
It depends on the leak’s location and size. A loose gas cap takes minutes to fix, while a very small leak categorized under a code like P0456 can be genuinely difficult to locate without a smoke machine, pressure transducer, or HC sniffer, which is why many of these cases end up at a professional shop.